You may be interested in reading the article we have written on the subject of Charting with the TeeChart for Java Component and MAC OSX. This article shows how we can use the TeeChart for Java chart library for designing applications with the operating system OSX.
To download and use TeeChart for Java follow the link to TeeChart for Java evaluation download.
For more information take a look at the TeeChart for Java pages.
Charting with the TeeChart for Java Component and MAC OSX
By Pep Jorge @joseplluisjorge | Steema Software
The TeeChart Java version component library offers the possibility of being used in Windows and MAC OSX systems and other environments that support Java such as Linux, as it has been designed using native java language code.
The charting library includes a long list of types of charts (series), including standard series types (line, bar, area, pie, Gantt, ...) and professional 3D series and types (surface, trisurface, tower, colorgrid, gauges ...). TeeChart's own tools may be added to charts, so that easy and fast annotations, paging, animations and other interactive value-add features may be included in the chart.
The Chart component also includes a list of Functions, which can be linked to a data source to be plotted in the Chart.
Here I will explain from scratch how to make a simple java desktop application for the OSX operating system in which we'll be using TeeChart Charting for Java and some sample values.
We can see the product details for Java TeeChart here: www.steema.com/teechart/java
The first thing we need to do is to download a trial version of the product TeeChart Java Web Suite; we can find the necessary information for downloading it on this page: www.steema.com/download/java
Once downloaded unzip the MAC. Zip file and within this we can find all the files necessary for use in our app. In this case we will use the TeeChart.Swing.jar.
This getting started guide assumes we have an installed version of Eclipse in our MAC.
Open Eclipse and do File -> New -> Java Project and give it a name:
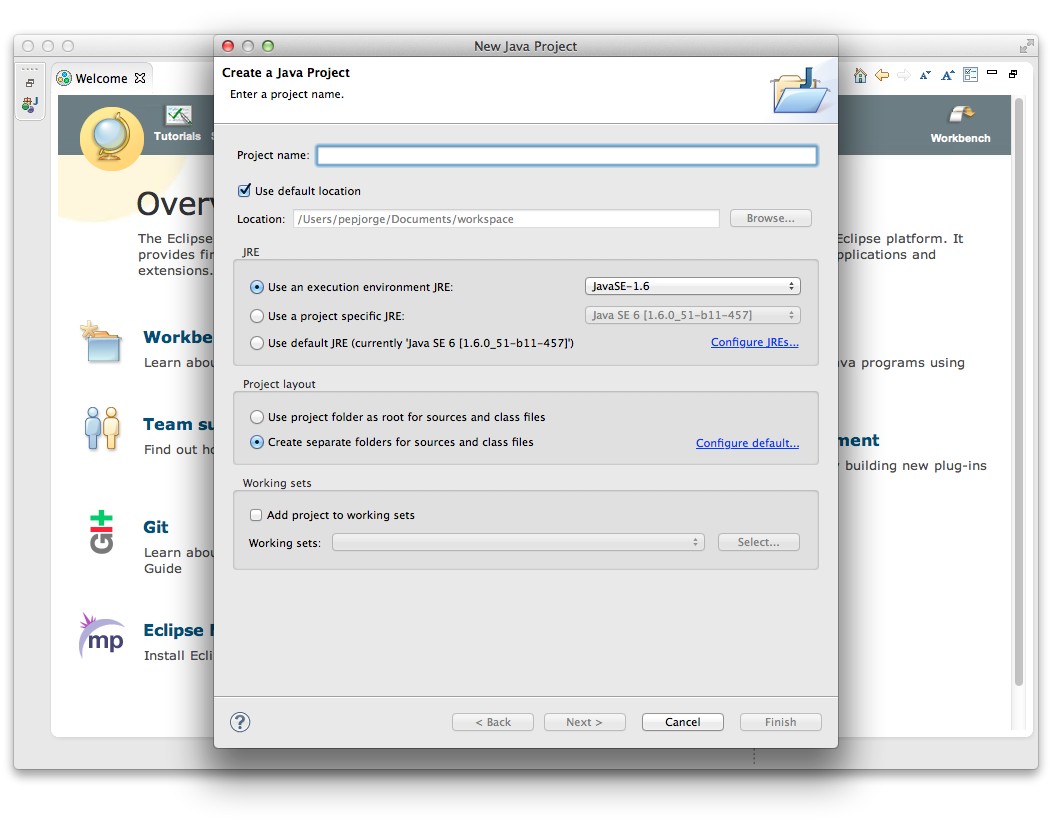
We click "Next", select the tab "Libraries" and press the button "Add external JARs ..", here we will add the TeeChart Charting Library for Java to the application; to do so , locate the unzipped TeeChart evaluation download and select the file TeeChart.Swing.jar before clicking 'Finish'.
You should see the following:
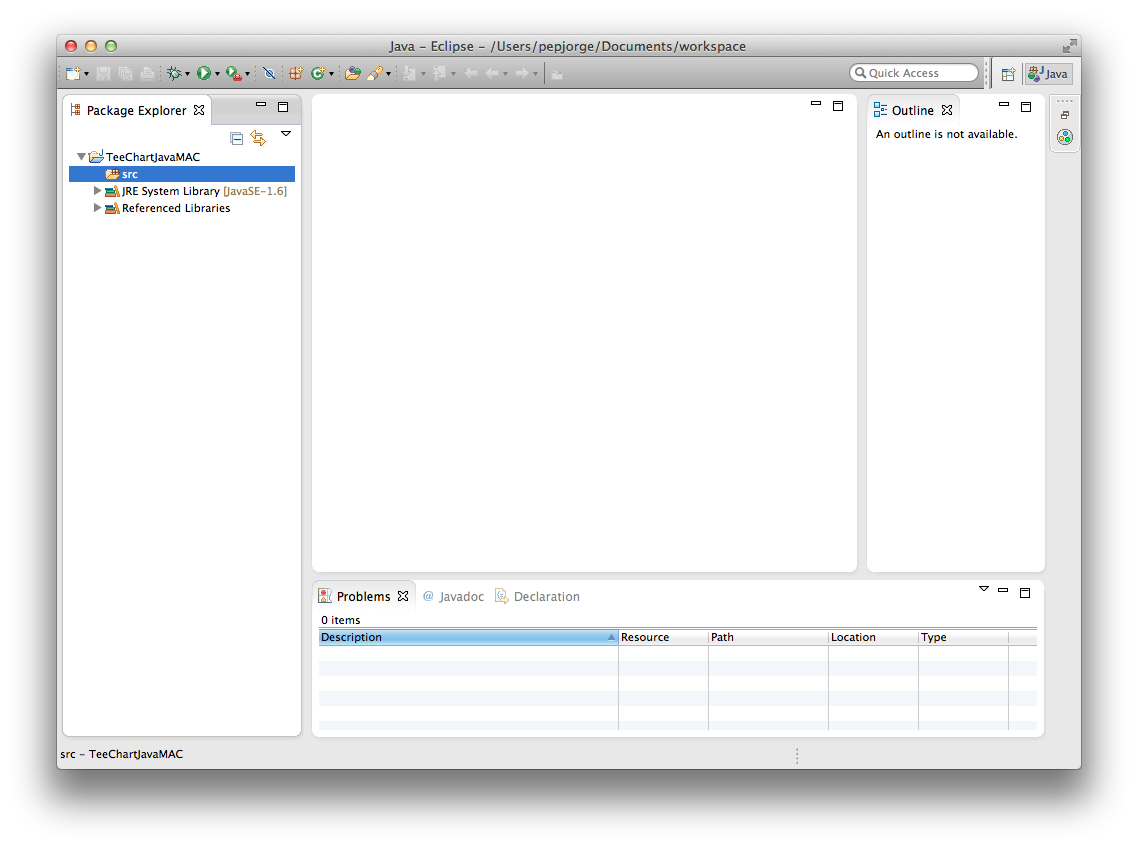
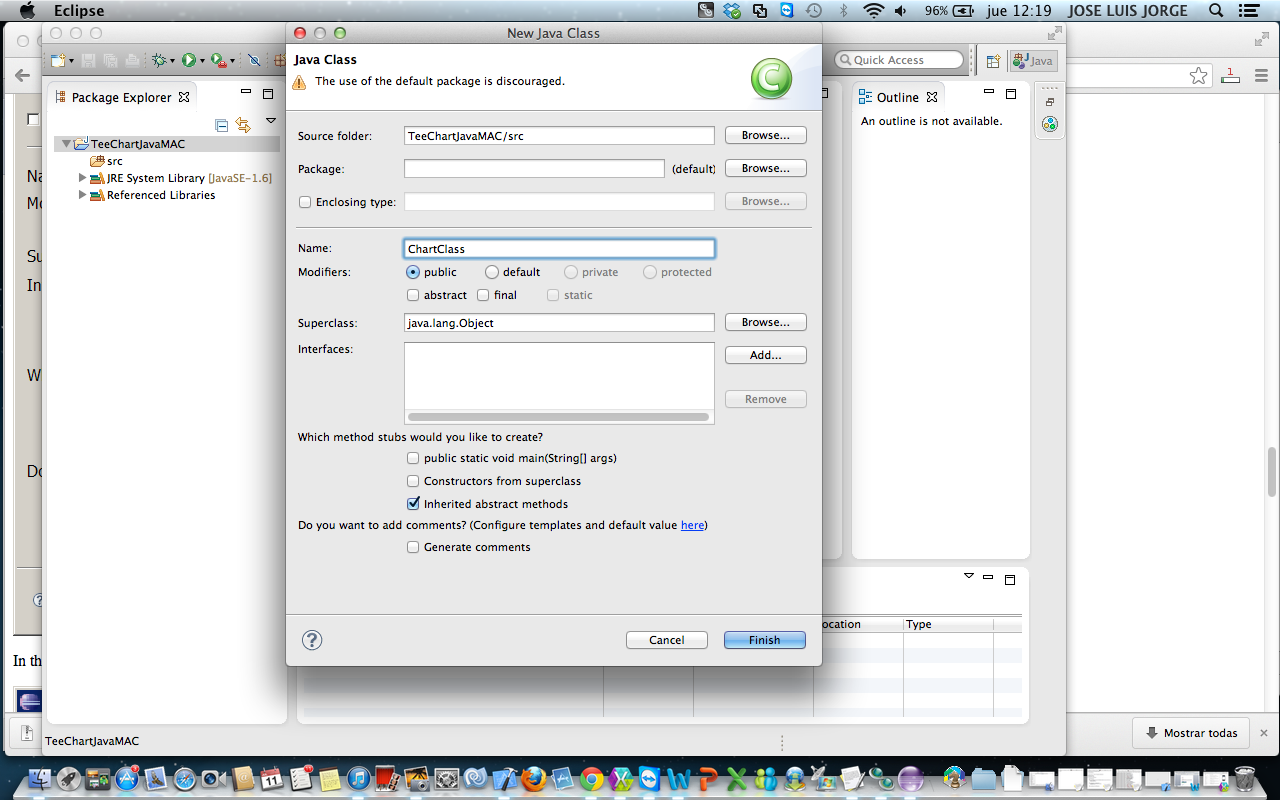
Now that we've created the project, we need to create a new Java file (with .java extension) and add it into the project. To create a new Java file, right click on the name of your project (TeeChartJAvaMAC) in the Package explorer pane and select New -> Class.
We'll name the project ChartClass.
Now, we’re going to add some lines of code to this class. In this application we want to show a Window that contains a JPanel containing an embedded Chart. To do this, it is best to delete all the auto-generated code that the default class contains and start over again. As you can see below from the code sample, we inherit from the class JPanel.
Initially the class should look like this (code):
import java.awt.BorderLayout;
import java.awt.event.WindowAdapter;
import java.awt.event.WindowEvent;

import javax.swing.JFrame;
import javax.swing.JPanel;
import javax.swing.UIManager;


final public class ChartClass extends JPanel {

    /** Creates a new instance of Main */
    public ChartClass() {
        super(new BorderLayout());
    }

}
From here we'll be adding all the working code to the class, you'll see the explanations in amongst the sections. The first step is to create a static method that will be the one we use to create and display in the Chart Window. This we will call createAndShowChart (). Inside we will create the window, give it a title, position, style, and make it visible within the application, it will take the following code:
    private static void createAndShowChart() {

        JFrame.setDefaultLookAndFeelDecorated(true);
        JFrame window = new JFrame("TeeChart for Java");
        window.setDefaultCloseOperation(JFrame.DO_NOTHING_ON_CLOSE);

        window.addWindowListener(new WindowAdapter() {

            public void windowClosing(WindowEvent we) {
                System.exit(0);
            }
        });

        window.pack();

        window.setLocationRelativeTo(null);
        window.setVisible(true);
    }
Now within the same method we will add the code necessary to create the Chart, and Series. We will also change various aspects of this, so we'll see how easy it is to work with the library.
TChart defines the object within the method, just before the line of code window.pack ():
// Creating the Chart object
TChart myChart;
myChart = new TChart();
We're changing some of the features of the Chart to give it a different look, including applying a Theme. We then assign specific gradient colors of the Chart panel, change the position of the Legend and set the Walls to Transparent.
The necessary code would be:
        // Changing the Chart aspect
        ThemesList.applyTheme(myChart.getChart(),1);
        myChart.getPanel().getGradient().setVisible(true);
        myChart.getPanel().getGradient().setStartColor(Color.fromArgb(255,5,150,203));
        myChart.getPanel().getGradient().setEndColor(Color.fromArgb(255,3,64,180));
        myChart.getLegend().setAlignment(LegendAlignment.BOTTOM);
        myChart.getWalls().setVisible(false);
Now it's time to create the series we want use in the Chart, we will opt for one Bar and Line Series. As you can see in the TeeChart example project or product specifications, the library of TeeChart for Java includes over 50 Series styles.
We created the two series, we'll add random data to each one and change some of its properties.
The code would be as follows:
        // Adding series to the Chart
        Bar bar1 = new Bar();
        Line line1 = new Line();

        bar1.fillSampleValues(10);
        line1.fillSampleValues(10);

        // Changing the Series aspect
        bar1.setColorEach(true);
        bar1.getPen().setVisible(false);
        bar1.getMarks().getFont().setColor(Color.WHITE);
        bar1.getMarks().setTransparent(true);;

        line1.getLinePen().setVisible(false);
        line1.setSmoothed(true);
Now we need to relate the Series to the Chart, as here:
        myChart.addSeries(bar1);
        myChart.addSeries(line1);
And to finish with this method we need to add our object, myChart, to the Window application. This line of code is enough:
window.add(myChart, BorderLayout.CENTER);
Finally, we only need to add the main method 'Main' to our class, where we'll call the method CreateAndShowChart (), for this we'll use the code below, adding it to our class:
    public static void main(String[] args) {

        javax.swing.SwingUtilities.invokeLater(new Runnable() {

            public void run() {
                try {
                    UIManager.setLookAndFeel(UIManager.getSystemLookAndFeelClassName());
                    // Calls the method where we create the Chart and add to the window
                    createAndShowChart();
                } catch (Exception ex) {
                    ex.printStackTrace();
                }
            }
        });
    }
The code won't compile without the necessary references added at the beginning of the class, we will need the following:
import java.awt.BorderLayout;
import java.awt.event.WindowAdapter;
import java.awt.event.WindowEvent;

import javax.swing.JFrame;
import javax.swing.JPanel;
import javax.swing.UIManager;

import com.steema.teechart.TChart;
import com.steema.teechart.drawing.Color;
import com.steema.teechart.legend.LegendAlignment;
import com.steema.teechart.styles.Bar;
import com.steema.teechart.styles.Line;
import com.steema.teechart.themes.ThemesList;
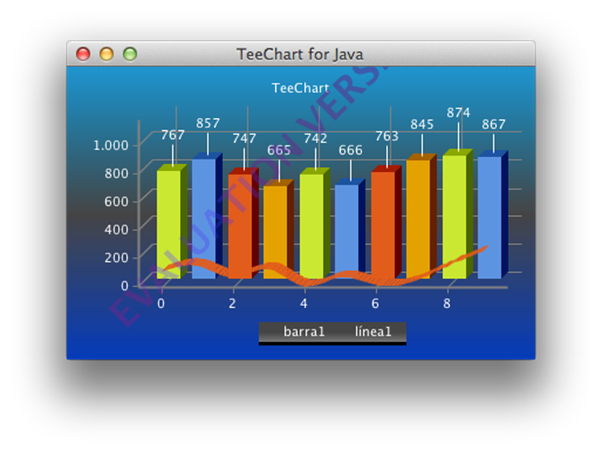
Now if we compile and run our application we should get the following result:
You can download this example via this link.
Charting with the TeeChart for Java Component and MAC OSX
| Steema Software SL. Copyright Information. e-mail info@steema.com.
Privacy Policy. All other brands and product names are trademarks or registered trademarks of their respective owners. |
||||